Banner Sponsors


For artists and collectors sponsored by Intercal...your mohair supplier and Johnna's Mohair Store

Hark! Do I hear my name mentioned??
Hi Melissa! Welcome to Teddy Talk! I haven't been around much of late...have had a nasty head cold that just wouldn't go away.
Welcome also to all the other newbies....I can't believe how many new 'faces' there are of late!
Melissa, the triangular wax you mentioned is in fact Ezy wax. You can just warm it in the microwave for 60 seconds on high (or pop it down your cleavage if you are lucky enough to have one!!) I find it so easy....just stroke it on in thin layers, buffing between each layer, until you have the desired effect.
Catherine, to get that old antique look you mentioned, just lightly coat a black nose with black wax..maybe just one or two light coats, then a single layer of natural coloured wax or beeswax and don't buff too much...you want it to stay dull. You can also colour over the wax with Copic markers or similar.
Another alternative to wax is Nose Gloss. You just paint it on in thin layers with a small paint brush..it is white, but dries clear. If you just want a little sheen, just use one coat...and if you want the high gloss wet look Clare, you just keep adding layers until you have the level of shine you want...easy! The most important part with getting the high gloss nose, is to make sure the previous coat is 100% dry before adding the next one (I leave for at least 12 hours between coats to be safe), otherwise the nose can go a bit milky. Also, go lightly with the amount you apply each coat. It does take time and patience, but the end results are worth it.
I have both the ezy wax and the nose gloss on my site www.bearcupboard.com/Catalogue/Catalogp … sities.htmif you are interested (if you are outside Australia, you'll need to copy and paste your order into an email), and I also have coloured nose wax in quite a few different colours, that I apply in the same way as the ezy wax. Compliments coloured noses brilliantly without milkiness.
Sue Ann, I am trying to sift thru 8 pages of 'stuff' that has 'happened' in my absence but I had to pause a moment and comment on your latest creations. That pair are just priceless!! You have such an eye for colours and textures...especially on your roosters! And the feet have me awestruck...they look so REAL!! I have no idea how you get the roosters to stand!
Great Work!:D
Okay Eileen! The truth is...that nose is SO GOOD...that I thought it was clay sculpted one! So there! I did mean to comment earlier on your beaut new avatar creation but got sidetracked. He's (sorry, she's) terrific! Well done!
I did like your little grizzly avatar...but this one is heaps better! No stopping you now!;)
 I know just how you feel Judi...we all have situations from time to time when we wonder if mistakes can be undone..and what a relief those times when it all works out.
Recently a friend sent $1000 worth of consignment bears to a shop and forgot to register and insure them. After six weeks the bears hadn't shown up and she was feeling much the same as you. When she had almost lost hope, the bears showed up...and she will never send a package worth so much uninsured again!
I'm sure it will work out...and we have all learned a lesson here too...don't name bears with the same names!
I can understand your preoccupation today, and I'm sending huge hugs to you. Your pain is shared by us all, and we know how your heart must be acheing.
Please God, wrap your comforting arms around our Jude today and give her peace.
It IS nice to be missed...you're all so sweet!;)
Marie and Eileen, glad your templates arrived and you have already had success Eileen! When can we see??
Danni, I didn't make it to the show...we had rellies around from all over Australia...some I hadn't seen for many years...plus I
was totally dead on my feet! Don't know WHY these things must fall on the same weekends!
Hi All.
After popping in quickly last Tuesday, I have once again been away for yet another week. I have been at the computer for hours and hours finishing a slideshow production for my Grandmothers 90th birthday which went off with a bang yesterday. I just couldn't face being at the computer for one second longer than I had to during that time so TT was pushed aside. I never would have thought I could get sick of the computer...but I ended up with neck strain, tired eyes, and a thick head....and was totally sick of the computer!Anyways, it's done now and my house looks like we've had a personal Cyclone...so most of today will be spent washing and vacuuming...but I wanted to pop in and say three things.
Firstly, thanks you all for your lovely birthday wishes last week...they meant so much.
Secondly...Pen..I feel responsible for your birthday being overlooked....I wasn't around and had my mind elsewhere...so please accept my belated wishes, and I hope it was a great day for you! Hopefully the new calendar will avoid this happening again. For what it's worth..I still have you down for two birthdays..one in August and the other on July 4th.:lol::lol::rolleyes:
And thirdly...Shelli....way cool that you won a Golden Teddy.....your work really shines and you are so deserving of that acknowledgement. Congrats to you!!!
I have also been working on a comp bear for a comp that is on in Melbourne (which is our states capital city). Well...they cancelled the comp with only 10 days notice...so I was very dissapointed......but more disappointed to hear that the comps in the shows in our neighbouring states later this year have been cancelled too.
Worse still, the show in Melbourne, which is usually three times a year, and has been cutting down to two shows a year, has been cancelled period, and last weekends show will be the last. This means no bear show for our state. It was a big show with over 130 exhibitors too so it's quite significant. Seems to be a sign of the times...but the promotor has been letting the show fall through the cracks for a while now...and she's obviously just decided she's had enough. I do hope someone else will step in and take over.
Now it's back to the housework...I've used up all my puter time catching up on 4 pages of chatter from you guys!
Winney,
The prices for economy airmail from Australia to Zone C which is USA,Canada and Middle East are as follows and are for post only..no handling or insurance.
Up to 250gm $8.00
250-500gm $13.00
500g -750gm $18.50
750gm - 1kg $23.50
1kg-1.25kg $$29.00
etc, etc
I have a lovely piece of vintage rayon in my stash that I would be interested in selling if you are interested....it is goldy yellow and the pile is about 1/4 inch long. It's very soft and shiny and came from the Eastern Block, Germany in the early 1940's. If you are interested, email me and I'll send a pic for you.
Shelli,
I've been 'off list' for almost a week so excuse my lack of acknowledgement for your answer. It was very helpful, thanks. My Father- in -Law is talking of upgrading and his camera is a lot more recent than ours and has heaps of options so we may try to prise it from him. I'll have a look in the manual.
Ta muchly!
After reading and taking a few DAYS to absorb this thread, I have discovered with dismay, that I am in the same situation as Nance, in that my camera will only take pics at 72dpi. But what's confusing me (and hubby...who knows more than I'll EVER know about digital cameras and dpi and ppi and pixels and....) is that upon searching the internet...we are yet to find an ad for a new camera which mentions being able to choose what size pics you take in dpi. Many give pixel size options sizes but not dpi.:/
Beautiful little bear Karen...and I love the toes too! Definitely a girl....and I agree with Marie (again, if you were asking!)...that Indy is cutesy as a name.
Well I shall try, try again Dily Doo...at least I didn't need any acetone to take it all off...it just picked off! It probably doesn't help that my eye size is 8mm..I think it would be easier on larger eyes.
Absolutely STUNNING work Irene! My but what a talented and diverse bunch of people we have here!
I have tried the eyes a number of times too Shari and with no luck. When I go to run the pin through the nail polish...the whole lot flakes off.:(:(:(:(
Wow Shari..he's fantastic! You do great open mouths and teeth!! Tell me..are they applied open mouths or slit ones?
WoW Laura...what a fantastic nose! I agree with Shelli...you should do more with that shape!
It's very easy to stick with our 'safe' noses when we know we can do them so well...but it's nice to have the confidence to try something new. I do think that's one of the many things I like so much about the template...you can 'try on' different sizes and styles so you know what will suit each individual bear.
Eileen..I don't think there is any right or wrong way to use the template. It's like most things, you need to try a few different methods and decide what works best for you.
I know Shelli uses it to trace her nose shape straight on the bear and that works well for her.
For me..I use two layers of template...first a layer of felt (a heavy thick one) and then a slightlly larger leather template (suede side up to help grab the stitches). I glue the smaller template to the larger one, then glue the whole thing onto the bear and use a tiny amount of craft glue to smooth the edges of the larger template down the edges of the smaller one to form the sides. Wait for it to dry and you end up with a rock hard template that gives a great base to embroider over. Using this method with give a raised up nose..so if you don't want it so big, just use the leather template instead.
I was taught this method by a friend who lives in Melboune and she does the BEST noses I've ever seen.
Marie..don't worry about the postage...the template qualifys as a large letter so the postage already added should cover it okay.
To get rid of the bulk in the corners of the ears...I start sewing around the corner...just leaving enough of an opening at the bottom to turn the ear thru. It's a similar idea to cutting the whole ear our as one piece and sewing then cutting a slit on the fold to turn it thru..only like Winney said..that method is really only suitable for mini fabrics or fabrics which don't have a nap.
So cut your two pieces, pin together as usual, then start sewing at the bottom of the ear (the straight part you normally leave open), around the corners and finish at the bottom...just leave a space big enough to turn the ear through. Then cut off the corners, turn the ear thru..and all you are left with is a little opening to ladder stitch shut and your seams are already tucked in and all. I ladder stitch the opening shut and use the same thread to stitch the ears on. Just take an extra stitch to secure the closing stitches before stitching the ears on though...otherwise when you pull your ladder stitching tight after sewing on the ears, it can gather the ears a bit.
There..clear as mud!
I enjoyed reading all the profiles...must get my act together and get one to you for me too Jane.
Marie..I loved seeing you...you are so beautiful!!!!!
Well done Danni!!! What a cofidence booster for you! I'm sure Bernard will go fast now!
Congrats to you too Irene...would love to see a scan of your article too!
I have to agree with that comment wholeheartedly Gina!! I have always thought the idea of trimming the fur from your seam allowance (as I think Laura Lyn or Winney does) to be a tedious and unecessary chore. But with my last bear, I decided to try it..just for the heck of it.
And do you know...I'm SOLD on it!!! I have made many, many bears..and always been one to pluck the hair from the seams after sewing..and then resewing (because the seam becomes looser once you pluck out the bulky fur). But after trimming the fur from the seam allowances before sewing...which didn't take NEARLY as long as I thought it would...I ended up with a bear with a superb finish to it. No matter how well you pluck your seams after sewing...there will always be a few bits that you can't get to pull to either side and they are unsightly..but by trimming the seams and the just brushing afterwards...the finish is second to none. So if you are like me and decided that would be too much effort....do try it!
My bear had long, thick fur, so if you are using short, sparse, you need to be very accurate with your trimming and sewing...so you don't get bare spots, wheras because of the volume, longer fur is more forgiving. In the long run...I found this methos quicker than my old way of doing things...and because there was less bulk at the seam...pinning was a breeze too.:D
So Wanda...do your bears have a true centre seam or are they two piece heads? If they do have a head gussett, you disguise it really well!
I visited your website..beautiful bears!!!
You're right Danni..and I worried about hurting Kim's feelings too....but then I weighed it all up and decided if I was Kim, I'd want to know...and who better to gently point you in the right direction than friends who truly care about you huh?
I know Kim will take it all as it was intended.;)
And if you had've gone one step further and said "I'm going to STUFF them" He would have thought you were a taxidermist!:D
Daphne..my vote is leave your name as it is. I really like it and it's the kind of name that sticks in your head which is important!
Shelli,
Something to think about....we lose points in Aussie comps if our standing bears feet have inserts of any kind in them. It's quite an art to put insert in that either can't be seen or felt.
I find just flling with glass beads to just below the ankle is enough to make my bears stand where I plonk them. Just make sure the ankles aren't too skinny. I hold the foot flat on the table whilst pouring in the beads...and sometimes when posing the standing bear, you need to roll the feet back and forth a bit to adjust the beads beofre they'll stand.
 Technically speaking...I think most references to a centre seam head are referring to the older steiff style bear heads with the head gussett slices in two. Yes it does seem like a lot of eaxtra work, and I find it enough of a challenge to line up the nose seams perfetly as it is without adding the bulk of another seam junction, so I won't be trying one of those. I think the two piece heads like Janes cuties, are just that, two piece heads. It can be confusing though.
As to why anyone would want to do a real centre seam bear...well you wouldn't unless you were trying to recreate the antique look of the old Steiffs.
I made one two piece head bear and really liked the look. You certainly don't get the roundness you get from a three piece head...but I think three piece heads are highly over rated! It's so quick to make up a bear without the dreaded head gussett...and for those of you who are ready to jump into making your own first design but are daunted by the whole gussett thing...the two piece head is a great way to get your feet wet!
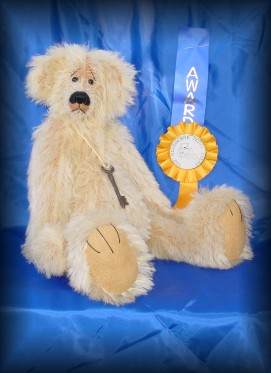
This is Lockie...my two piece head bear.

