Banner Sponsors


For artists and collectors sponsored by Intercal...your mohair supplier and Johnna's Mohair Store
very sweet little one 
he is absolutely lovely !
i wish i could copy and paste it into my glasscubbard 
thank you all
bobby i worked with sheetland wool
and the dragon from this lady will be my next project
ah brigitte, just checked your link, that is an other side, on my step to step stumblings, i linked to her blog i think.
this side you linked got a lot more tutorials will have to check how far i get without googletranslate
thank you a lot girls
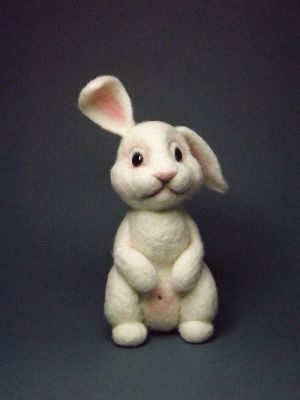 on facebook i found on a russian blog (http://utichka.livejournal.com/116035.html) the instructions for a little needlefelted bunny and i gave it a try.
i documented the progress of my tryings on my blog
http://mytopteddy.blogspot.com/2012/01/ … art-5.html
it is in 5 parts, and all parts are 100 photos.
the little one is about 14 cm high without ears
medium soft - inside is a bit flexible, the outside rather dense.
coloured with chalk
this is a - wow - bear :D
very cool looking
hahahahahahahaha
thank you
pretty lady
cute
OMG thats awesome !!!
it looks absolute perfekt !!
she is soooo cute again :D
i love your creations
she is lovely
love love love !!
ah and this jumper
an once is 28 grams
uh :)
i dont know if i am the right one to explain stitching, as my english isnt very good for such detailed stuff.
you do know the backstitch ?
first, dont start sewing at the point where you start to sew, the knot doesnt make things easier.
start a few millimeter away at the sewing line, and sew back to the point where the actuall beginning is.
then the back stitch ... you stitch in with your knotted off thread, on the back you go about 2 mm forwards on the seamline stick your needle in and come out on the front.
now go 1 mm back on the seam line, come out on the back, and go forward again 2 mm, come out on the front, and go back 1 mm .... this you repeat till you at the end of the seam
and there you dont knot off, but sew back again a few stitches, 2 or 3 ... and there you knot off.
i knot off this way, stick the needle from the front to the back and dont pull the whole loop through but leave about 3 cm on the top.
come from the back to the front and pull the needle through the loop.
pull tight
and now again, needle to the back, leave a little loop, needle from back to front, and pull needle to the loop.
then when you want to make it really secure, go with your needle to the sewn stitches, just run it under the thread of a few stitches backward on the seam.
maybe try it on a little piece of fabric first
oh i love your bears so much
they got such a lovely face
so sweet
oh oh .... to start with such a tiny little thing is frustrating !
i would also sugest, put it to side, and start off with something a little bit bigger.
the gusset to the sideparts .... usually you do sew the neck to nosetip seam first, i did try on smaller one, to do it after fixing the gusset, it doesnt make it easier.
i usually make a tiny stitch at the center seam to to center of the gusset to hold it in place and also attach it with a tiny stitch at the curve where the eyes will be.
then i sew from the back of the neck all around to the other back of the neck.
the intention at the eye part of the gusset, ... uff ... i usually do it with needle sculpting, but with such tiny babys its going to be hard. here the tiny makers need to jump in
ohhh so sweet !
i love this face
she is so cute
lovely
wow karen what a lovely art !
where do you learn ? from cd or a real class ?
show us photos ?
i want to know much more about it all
so sweet the 2
she is really sweet
ohhh they are sooo cute

