Banner Sponsors


For artists and collectors sponsored by Intercal...your mohair supplier and Johnna's Mohair Store
 Cincinnati, Ohio
OK, I looked in the subjects listed for information on sewing minatures. I would like to make a small bear (about 5 inches) I hate hand sewing but am willing to do it anyway. Is that what everyone does? Is the back stitch the usual method of hand sewing? Do you mark both sides so you can make sure you are sewing evenly? Any hints are very appreciated!!!! Thanks everyone!!!
 Anavy teddy bears
Hi, sewing a 5 inch bear in hand is quite quick, so don't worry about that. I use regular backstitch on all parts of the bear (my smallest so far is 1,5 inches tall), I only use variable length depending on the size of bear/part. I use double thread for closing the holes for stuffing and single thread for other pieces. I do not mark either side of the fabric, it's quite easy to see where you are inserting the needle.
 Pumpkin & Pickle Bears
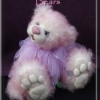
Ooh, how exciting - a miniature Connie bear!!! :dance:
I use doubled thread for all of my hand stitching - I tend to pull quite hard so I need the extra thread strength!! I think most people back stitch (I do) and a really good word of advice is to make your stitches VERY small and VERY even on a miniature. Also use a fabric with a good strong backing as turning miniature limbs can test even the strongest fabric!
Please keep us updated...can't wait to see your little bruin!
 MerBear Originals
I backstitch on mini's and larger. If you order from Sassy, try her bobbin threads. They are extremely strong and you don't have to double them.
Marion
 P.F.A.T.T. Cottage
I too use a backstitch and with material that has a grid on the back I try to go 2 squares up and 1 square back. I use a size 10 or 12 quilting needle and stay about 1 square away from the edge. I know that sounds tedious but after a while it becomes second nature and you can do it even on material that doesn't have the grid. Good luck and I look forward to seeing you little one.
mini hugs,
Jude
Connie i really can't add anything that hasn't already been said but i just wanted to say i can't wait to see your bear when he or she is finished.
Oh just one thing, i always fray check all around the edges even if the fabric has the grid backing.
Keep us posted and have fun :hug:
Hugs
Vicki
Ok i thought of something else :crackup: Don't forget to trim away the fur for your seam allowance so you will have nice neat seams 
Hugs
Vicki
 Creative Design Studio (RKR4CDS)
Ditto what everyone else said..
If there were particular points that HAD to be matched (like the eye sockets on the gussett matching the same spot on the side head pieces.) I tended to put a small mark on both pieces, tack them there with a thread and also tack the center muzzle seam (going toward the chin & neck opening). That way, whether you're sewing alternately from the center mouth/chin seam toward both eyes and continuing on to the back of the neck/head, or sewing from one eye spot around the the other past the center muzzle seam, the pieces won't shift and slide away from each other and end up with a crooked nose/muzzle.
It can be tricky to get them even if you're not used to sewing minis and/or sewing by hand.
This is one more little bit that may or may not help you ease in the fabrics to each other: it's difficult (wordy) to explain so I usually gave the tip only at in-person classes.
If you've ever set a sleeve into a blouse, sweater, coat or a jacket, you'll know that the sleeve cap (the rounded part at the top of the sleeve) has more width/fullness than there is in the cooresponding armscye. Look at any well-tailored coat or jacket hanging in your closets: the jacket/bodice part looks as if it has been slid (grammar??) into or underneath the top of the sleeve cap. It looks that way because it HAS been assembled like that. These 2 seam allowances themselves help to support this roundness from underneath.
That's why they always mark those 2 little triangles at the start of the underarm on both patterm pieces, because you will be easing the extra fabric in the sleeve top into the shorter length of the armscye, between those two spots.
The best way to do this (in clothing) is to have the fuller piece of fabric on top of the other. As they lay over your hand, you can see how the upper piece has to be a bit longer to accommodate going over the under fabric and the curve of laying over and hanging down off both edges of your hand.
Carrying this to the small head piece, you'll have the best results if you do the same in sewing the head togeter:
When you measure out the length of that side sea, make sure they're both THE SAME LENGTH. Some ppl use a measuring tape, some a length of string, etyc.... They will match from the tip of the nose across the ear area to the back of the head on both the side head pcs & the gusset.
BUT, to get the best fullness for a nicely shaped head, mark the points where the side head pcs start to flare out. (it's usually where the eye will go) and the gusset if it has a gently slope in that area instead of an abrupt flare-out.
Now SLIDE the SIDE head template just slightly forward and re-mark the eye spot again. This will put another mark just behind the first match-up marked spot. The gussett marking stays the same but you'll have 2 marks in the seam allowance of the sides. I'm a great believer in tacking pcs together at critical points so they don't shift. even a 1/16 of an inch makes a big difference if the area is only 1/2 an inch long!
The lengths of the seam will remain the same, but now your matching ratio slightly favors the side of the head pc in the muzzle area and the gusset part to the rest of the head as being a bit longer/fuller.
When you sew them together, hold the 2 pcs in your fingers so that between the eye & the center chin seam, the outer or upper curved piece is the the side of the head. That eases in all of the (tiny bit) of excess length where it meets the nose end of the gussett.
After passing the eye spot, where the gussett and the side head pieces both flare out wider, reverse their positions so that thye gusset piece is now on top of the side head pieces. That adds a bit more fullness across the top of the head so it's not a flat forehead or flat-top head.
In this way, I actually started and stopped a couple of thimes while sewing these 2 side seams. It created a perfectly balanced head. No stuffing techniques are going to be able to mask it when the seam on one side of the head doesn't exactly match the other side. This tiny bit of rounding-off as you sew makes a big difference in the finished product, especially if you remember which place has the slightly wider spot as you stuff.
And of course, if you want a very narrow muzzle or a flatter appearing top/back of head, you'd hold the 2 pieces opposite to this as you sewed them together.
Does that make sense w/o a picture? My DH went out-of-town today for a week and took my pocket digi with him...
Cincinnati, OhioBobbi,
It makes absolute sense what you are trying to say and I thank you immensely for taking the time to make that explanation! Thanks everyone for your input! I hope to get started on this fellow in the next few days. Unfortunately my oldest son has fallen behind on his school work with all the goings on here and now I am trying to get him back on track. He started September with an A in honors math and he now has a D! 
 Cat Gabriel Crafts
Hi Connie, best of luck with your first mini  I don't have any groundbreaking tips to share with you except to say make sure you make the openings large enough otherwise you'll get into all sorts of bother trying to turn the pieces!
I use a size 12 needle and use backstitch. I've always just used Gutterman thread but have just recently switched over to the Super-Ion nylon thread from sassy's - it's great
Cincinnati, OhioUpdate on my first attempt at a miniature bear................. So far no luck! I have started two bears with different fabrics and they have both landed in the UFO pile, never to be heard from again! However, I just placed an order with Sassy after hearing about that site here, and am waiting for fabrics from her that are better suited for minature bear making! I think the backing on the fur I was using was too thick. And lots of fraying as well........... So back to the drawing board when my order arrives!!!
Aww Connie! I'm sorry to hear about those first 2 bears and your son's math trouble Honors math can get VERY tough!
I'm one of the few who actually sews the majority of my mini's on my machine. I hand baste to be sure nothing shifts. I use a very light foot on the pedal and sometimes just turn the wheel slowly by hand to have more control.
I do sew the head and footpads by hand. And yep, a back stitch!
Hugz,
Laura