Banner Sponsors


For artists and collectors sponsored by Intercal...your mohair supplier and Johnna's Mohair Store
 Kates Mates
My first mini-bear (in Sassy) underway ... was going reasonably okay until I got to the ears. Please, are there any tips for sewing on ears? I've had one ear on and off four times .. mainly due to placement .. but also the stitches are so difficult to disguise!
Is invisible thread really strong enough? Would it help?
I also find it nearly impossible to turn and hold a seam allowance on the bottom of the ears. Maybe it's my big hands! :doh: :doh: :doh:
HELP!
K
 Teenytinyteddybears
Hi Kate
I have found a way that works well for me. Now to try and explain it. Easier done than said....
I cut the ear a little longer than I need it and then place it where I want to with small running stitches. Once it is secure I use a ladder stitch to sew the stitch line of the ear to where the ear fits onto the head. Pulling the visible part of the ear over where I have attached it. I have also found it helps to trim the inside seam allowance of the ear right down to next to nothing on the part that is going to be folded in. It makes it less bulky.
I hope I haven't made you more confused.
 Tuppies Teddies
I too cut the ears a little longer and with the long thread still attached after closing the seam I take the thread right through the head to where the other ear is to be placed and then return through the head and ladder stitch the ear in place. I do the same method when attaching the 2nd ear.
When turning the itsy bitsy ears I found a chopstick is great for pushing the ear seam out...
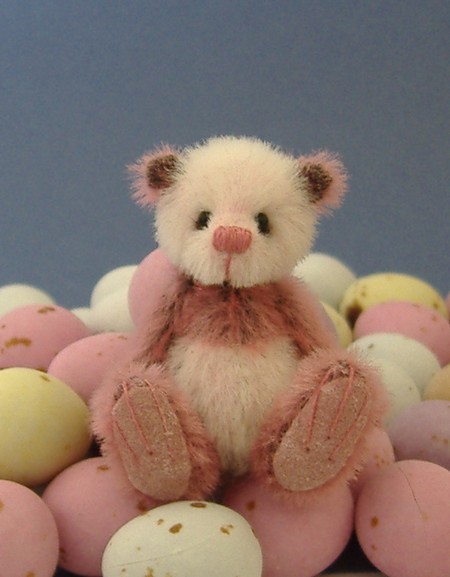
Fleur the little bear in my avator is a little mini 3.6"...used this method for her and my other little ones on my website..
 FenBeary Folk
Hi Kate, I am quite new to minis but ears are a ........................bleep. I tried invisible thread and boy do I hate it. I do use it for ears though. The tips above are great girls 
 Chaska, Minnesota
Hi Kate: I found that pinning the ears on at each corner where I think they should go. Next go to a mirror and place your bear head in front of you and look at it. It can help you see if they are straight or not. With the muzzle facing away from you, look down on top of his head. That too helps you see if they are pinned on straight.
So with pins in the corners, I tack down the corners starting at the top part, pulling the knot through the fur with a little tug, going through the tip and coming back down near the knot was pulled through. But as you go back down near the knot you exit the needle to the other corner of the ear, anchoring down both ends. Use a ladder stitch, to hides the stitches. Continue to sew the rest of the ear on. If you don't know how to do a ladder stitch, here is a little lesson:
Kates MatesThank you everyone for the wonderful tips :hug: and yes, Carolynn, I understood - your instruction is very clear, very helpful. Am going to try all the tips suggested.
I can see that this little bear is going to be a test critter - not expecting too much for first try.
For all the bears I've made, I've certainly discovered minis are a totally new ball game!
Thanks all,
K
 AlmostBears
Well i cheat nowdays and make clay ears  but before i started doing that id just have a piece of thread thru either corner of the ear (bottom ofcourse ) then run the threads down thru the head and out the neck, tie them together and do the same for the other ear ... but i suppose it would depend on the size your making, my bears are under 3 inches so i found this way worked the best and they were securely fastened, but with a bigger mini bear you might find that only being attatched on either side of the ear just isnt enough
Ive even been known to superglue my bears ears on in a fit of frustration so i do know how you feel 
 Fulrfun Bears
a thing i do is only use one piece ears. I find on miniatures the nap isn't as obvious - so if you do one ear piece one way and the other upside down with the corners touching when you cut them out then once sewn make a hole at the bottom fold and turn it through (this is probably clear as mud)! Another option is to use fur one side and paw pad fabric the other then they aren't so bulky. Good Luck
Hi Kate
Try trimming the front ear almost completely down to the backing - if you are making anything under 3 inches, this is the best option.
Definitely use invisible thread - it's much easier to hide your stitches. Buy a quality .004 monofilament such as YLI - not that squirrelly thick stuff- and use a nice small needle and you should have no problems with it knotting and tangling.
I don't bother to try and turn under the raw edges - that makes your ear more bulky and harder to sew on in a nice curved shape and I don't use pins as I find they tend to push the ear out of place - and even if it's only a few mm that makes a bid diff on a 2 inch bear.
I whipstitch across the bottom of the ear with my invisible thread - using the same thread I come out the corner of the ear - go in at the head where I want the bottom of the ear to sit and come out the head where I want the top corner of the ear to sit. I then catch the top corner of the ear with my thread - - your ear will now be sitting nicely on the head. If you make your scoop in and out of the head slightly smaller than the width of the ear, you get a nice natural curve.
Next I push the ear flat against the head with my finger and ladder stitch across the back, from the top corner down to the bottom - the beauty of using invisible thread is that you can take many tiny stitches to get a really firm hold and you won't have any bulky thread showing. Then I stitch a few times at each corner to anchor the corners nice and tight - this also helps you to shape the ear just how you want it.
Poorly stitched ears are my personal bugbear - and this is the method that works best for me. I'm not at home and don't have any photo-editing software on this pc so can't get a super close up photo - but this bear is only just 1.75 inches tall and I used this method (trimming inner ear completely, stitching from the back) on her.
 Benson Bears
I'd never ever use superglue on any fabric item as it eats the fabric away over time. I know of a collector who bought a miniature at great expense from overseas, and after a few years it started falling apart because superglue was used to attach accessories!  I tend to shy away from using anything with a strong chemical smell on any fabric, I want my bears to last, I would be mortified if I learned that they fell apart because I'd used something that just shouldn't come in contact with fabric.
Kates MatesHi Melissa, Clare and Linda,
Thank you for all the wonderful tips and hints! I'm not sure I'll ever get these little ears to sit right - I rather suspect it takes lots and lots of practice. I have to say ear placement is much harder on these little guys than their bigger siblings.
Anyway have finally finished him - poor li'l fella - the stitches show on his ears, he has six toes instead of five, the pulled toes have wrinkles in them. I claim him as my little 'prototype' and one day when I can bear the shame, I'll post his picture!
In the meantime, happy bearmaking and hugs
Kate
PS - Melissa your little one is just the cutest!
Anyway have finally finished him - poor li'l fella - the stitches show on his ears, he has six toes instead of five, the pulled toes have wrinkles in them. I claim him as my little 'prototype' and one day when I can bear the shame, I'll post his picture!
oh you should show his his picture and be proud of him! You are absolutely right - as with all bear making mini bear making requires a lot of practice and it took me a while to get my head around it and some of the techniques I use are the complete opposite of all I was taught when making big bears.
If you saw my first bear you'd fall about laughing either that or cry in pity for the poor fellow  Actually same goes for my second, third and fourt bears if truth be told!
 Southern Bears
I am busy with a mini now and have already had to remove his ears twice! With all these wonderful tips I can complete him this weekend. Thank you everyone.
Pat xx