Banner Sponsors


For artists and collectors sponsored by Intercal...your mohair supplier and Johnna's Mohair Store
 Past Time Bears
Beautiful, Shelli!!
 Posts: 3,540
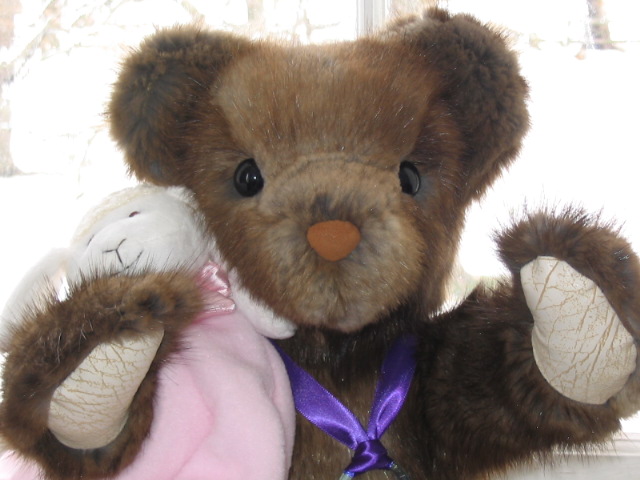 Ah! Maybe that's what the problem is...I'll have to go see if I saved it properly.
I think your little ted is soooo cool! Very cute!
I've just looked and the photo is saved at 1600 x 1200, JPEG image, 332 KB. ??? I'm not that good with computers, but the other two pics that I put on here are roughly the same size.
Am I doing something wrong? Should I be trying to resize it somehow??
Posts: 3,540Well I've gotten "Baby Girl" on here, but not "Bernadette" who I was originally shooting for. Oh well, at least you can see the type of nose I was talking about 
 Back Road Bears
One question... when I insert the nose/eye loop, it's going to go right into a seam. Even if I poked a hole into the pelt the chances of it tearing are great. What do I do?????
 Flying Fur Studios
Debbie, nice noses. I have a book where the author also does that. Although she uses felt. Same idea though. I think it's a great option though.
Hi Daphne
I will tell you what I do for noses on my fur bears and it is so simple you will wonder why you didn't think of it I also feel that they really look good on natural fur bears. Take a safety nose and cover it with soft leather. You simply cut a circle ( I use one of my joint discs that is bigger than the nose I am going to cover), sew a running stitch around the outside edge, place the safety nose inside the circle and pullup the threads and tie them off. The nose is now covered. You may have to stretch the leather around a bit to even out any wrinkles that may have appeared. As the safety noses have nostrils you can just see them faintly under the leather. When sewing up the head from the nose to the neck area I leave a small space at the tip of the nose unstitched- this is where I insert the nose once the head has been completely sewn. Now put the safety clamp on the back of the nose from inside the head. In order to make sure the nose is on well I place the hole in a spool of thread over the post of the nose and hit the thread spool with a hammer a few times. This makes sure the nose is indeed firmly attached
Hope this helps
Hugs
Gail :hug: :hug: :hug:
Back Road BearsGail,
That is the simplest technique I've heard yet! Wow! You're right... why didn't I think of that!
Well, I'm making 3 bears with this mink so I'll have to give each one a different nose and see which technique I like best.
Thank you SOOOO much!
Daphne
Hi Daphne
I am betting you will like my idea the best as it is the easiest to do and the easiest on the fingers as well as looking realistic. So glad I could help you given all the help you gave me with the Teddies 4 Charity
Hugs
Gail :dance: :dance: :dance:
 Patsy Lake Bears
Wow Gail what a great idea
 Tuppies Teddies
After posting a question on polymer noses I though to check out this topic.
What a great idea, will try it for my next bear.... thank-you Gail..