Banner Sponsors


For artists and collectors sponsored by Intercal...your mohair supplier and Johnna's Mohair Store
 Chaska, Minnesota
Peta wrote: research puppetry
Peta: what a great idea!!!
 Hi Guys!
Finally beginning to make use of this wonderful forum.
I've been using eyelids for my bears ( or should say my animals?) for over 16 years but am stumped about
how to go about creating closing eyelids.
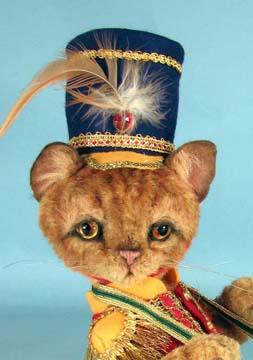
Included is a photo one of my recent cats with what I call a double eyelid- (top and bottom)
Actually I have idea but know I would need a very soft, thin fabric to use for it.
Anybody with ideas?
Hugs, Mary javascript:insert_text('%20:/%20',%20'');
 The Littlest Thistle
Mary, would thin ultrasuede work maybe? It's not something I've ever tried, I have to admit, as I don't think it would suit my little guys!
 Benson Bears
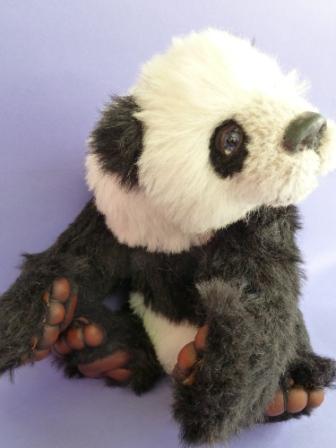 Hi Mary, I've just cracked the open/closed eyelid thing.
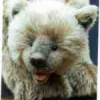
I used an extremely fine piece of leather (the suede side was the "right" side), I cut an oval shape that was a little larger than the diameter of the eyes (measuring across the shorter not longer diameter of the oval). I then cut a length of 2mm aluminium wire that sits across the centre of the oval (again the shorter diameter) with some extra length on each side (legs). Now spread a little water based leather adhesive across the middle of the leather oval and place the wire onto it, fold the leather in half so that you have encased the wire along the fold. Now bend the wire legs so that they are more or less at right angles, and also bend a curve in the rest of the wire to fit over the eye. Push a couple of holes into the head at each side of the eye to take the legs of wire, run some very small running stitches around the the curved edge and pull them up slightly so that when you pop the wire legs into the holes beside the eye the top of the lid fits nicely over the eye. Now hold the leather eyelid in it's closed position over the eye and ladder stitch it into place around the top of the eye. Add some stitches from side to side to make sure the eyelid is well secured. In this panda I have added a static bottom eyelid using leather thong and needle felted the whites with merino wool tops. Use the wire to pose the eyelids, open , closed or sleepy. I hope this helps, I've admired your work for many years, Mary. I wish I could look at your website, but for some reason it won't open for me ( maybe it's my dodgy satelite broadband) 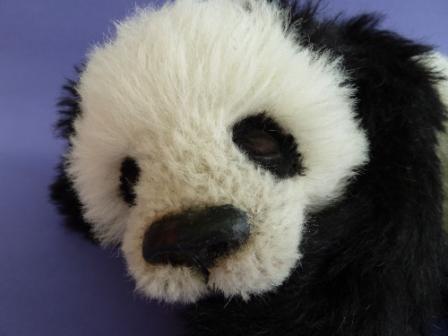
 Creative Design Studio (RKR4CDS)
Hi Linda,
I have been wondering if this thread would ever get revisited! And I should have known that it would have been by a technician such as yourself!
Yes, what you describe—the very supple fabric centered over the wire as the edge of each eyelid, with the wire ends bound together and entering the corners of the eye together—is exactly what I had in my mind back in 08. The true trick is in hiding the excess when the eye is open! I read about the open/close technique in an old book about the molded felt faces of Steiff's puppet/dolls sometime in the 80s (in a book store—I couldn't afford the actual book!) and tucked that bit of info away.
They also actually sometimes designed a bit of a crimp in certain parts of the top lid wires as well, to define the different characters, instead of just smooth curves going across the eyeballs - - much like one's eyebrows give away mood emphasis. A little bit of a eyebrow lift or crinkle here or there on a 'human-like' face denotes much about one's disposition or personality w/o saying one word!
Benson BearsThis technique came to me when I should have been asleep, Bobbie. Like a bolt of lightning. But it does require an extremely fine piece of leather and I think I used 1mm wire, not 2mm. I've done it on a few bears now, and I'm pretty happy with how it works 
I tried the same thing a few months ago but never really perfected it - I think I was working on to small a bear for the first go. But it's sure nice to know that my brain is thinking like someone else :dance: :dance:
Creative Design Studio (RKR4CDS)Fabulous Linda, isn't it amazing what happens sometimes when we're either just falling asleep or just waking up?
If only we can remember them all.
I haunt resale shop for old leather gloves and have found some wonderful old pairs, even an electric blue shade which I couldn't pass up but knew I'd not use in that color.
But with dyeing or staining - - - it's the quality of the leather that you have to first be aware of; color is secondary. Fortunately the predominant colors that the finest gloves are made in is black or brown!
 Posts: 54
Thank You Very much, Linda, for sharing, I'm appreciated so much.