Banner Sponsors


For artists and collectors sponsored by Intercal...your mohair supplier and Johnna's Mohair Store
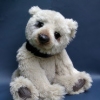
I've yet to make a real fur bear but have Nancy Tillber's excellent resource book, TEDDY BEARS WITH A PAST, as well as my first-ever vintage coat -- I bought a nicely priced one, with lots of useable fur, in rabbit. That was on the recommendation of Nancy, who said rabbit is excellent fur for a beginner.
I'm hoping those of you with experience in real fur bears will address some or all of the following:
1) What is your favorite real fur for bearmaking? Why is it your favorite?
2) What is the hardest real fur you've worked with to date... and what made it so difficult to manage?
3) What fur will you simply NEVER work with again... and why?
4) What special tools, needles, or aprons (cause MAN, does that fur fly!) do you recommend when working with real fur?
5) What did you learn THE HARD WAY that you can help beginners like me avoid on my first attempt?
Thank you in advance for anything you can offer!
 PottersHouse Bears
Hello Shelli,
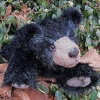
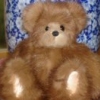
I have made several real fur bears and have found mink to be my favorite. Mink is easy to work with and doesn't seem to shed as bad as some other fur and it also is probably the best seller. I made one bear out of coyote and swore that I would never do that again. I itched and sneezed the whole time and the fur is so thick and long that it was difficult to work with. I can deal with the difficult part but the itching and sneezing is too much. I am working on a bear with sheared beaver now. I have the head finished as of last night. I really wasn't sure if I would like this fur, but I can tell you right now that this is going to be one cute bear. The pelts are somewhat thick but not too bad. Glovers needles are the way to go.
 Baird'sBears
I think the first most important tip for a beginner (as I am) is to watch the placement of your pattern pieces very carefully.
Unlike mohair, real fur varies in nap, color, pelt quality, pelt-to-pelt stitching, quality of undercoat et al. throughout the fur. Since you'll be placing your pattern pieces on the pelt side, you need to first examine the fur side very carefully.
Next time, I'm going to cut a set of transparent plastic templates to help with the placement. This way I'll be able to see which bits I'm choosing for which templates, and make sure that matching pieces match, and that areas to be seamed together are as close in nap and color as possible.
The second most important tip is about cutting apart the vintage fur in the first place. It can be incredibly messy, and it takes time to remove those stitches without tearing the pelts. Old linings and tapes and threads can be most yucky. The furs I've cut apart have often been full of tiny granules--these are bits of the bran, or ground corn husk or something else used for cleaning. Nothing to worry about, unless they have legs!! :D
Eileen
Baird'sBearsAlmost forgot . . . rabbit is lovely stuff, but has a reputation for shedding. If the coat sheds, I'd look for another one. Well-tanned rabbit skins do not shed (got this from a furrier).
Eileen
The coat doesn't shed... it was just a huge mess when I was ripping out the seams, because little tufts got ripped out at the edges along with the stitching. It really looks like a brand new coat and I couldn't get any fur to pull off anywhere I tried. It was fairly cheap and should make 2-3 bears in my typical size range (14-20") so it was a worthwhile experiment. I'm keeping fingers crossed.
I am grateful for the explanation of the "granules" because they were all over my tabletop after I pulled off the backing and I couldn't, for the life of me, figure out what all that "sand" was!!!
Baird'sBearsI wasn't dissing your bunny, Shelli, honest! :D
I've just read negative comments about rabbit, and I'm here to defend it from all and any detractors.
Now, live rabbits shed like crazy . . .
Eileen
PottersHouse BearsAmen, and amen! Live rabbits do shed like crazy. Except my Rex rabbit. They have very short hair and do not shed, but then I certainly am not going to make a bear out of Gracie. She's perfectly content to remain a live rabbit. Spoiled rotten and happy about it.
If at all possible, I try to work on the coats outside on the patio. It sure makes clean up a lot easier. Do it on a day when there is a slight breeze and all that hair just flies away.
I also have a leather thimble that I use when sewing real fur. I use it to push the needle through the pelts and it sure saves a lot of wear and tear on the finger.
I love mink... So beautiful and soft. I also like rabbit. :)
I have chinchilla - whoa nellie, it is super delicate!
I didn't like oppossum, kinda coarse and rough, I have raccoon, beaver - both alittle coarse, but sheared beaver is nice, and I have fox, Super nice but really dense!
I have found some great rabbit furs that are dyed on ebay (leopard print, spotted...) just be careful, you can't touch the fur and inpect the quality.
 Posts: 1,153
I used to make a lot of mink bears and bunnies. Still have many mink stoles around.
To address Eileen's comment about the nap of the fur... I found a solution that worked for me.
I would shake the pelt so the fur would lay the way it wanted to naturally and then take my pattern piece (one at a time) and lay it on TOP of the fur...to see which way the fur was going to play out for that particular piece. Then I would carefully pick up the pattern piece and slip it under the fur in the exact same position...hold it tight, flip the whole thing over and trace the pattern piece onto the back of the pelt.
Another thing I found important...I generally used the very edge of the pelt for the muzzle and inner ears (if the edge went into the belly part. The fur is alway shorter there and sometime lighter in color.
Hope this makes sense. :/
Nanc.......
 Past Time Bears
Nancy, just want to say we're so glad you are posting again . . . welcome back - we've missed you a lot!
 Teddy D Factory
Hello all, Very interesting to read about your fur experiences. I'm here down under in South africa and also make bears by recycling fur coats. Mink was the best to work with, Raccoon the most difficult. I do make a lining for every piece of the bear so when the bear gets stuffed I pushed the stuffing against the lining and not against the fur. I have found that sometimes one does not always see the weaker parts in the fur, and might push the stuffing right through a weak part in the fur. AND that after you have done your sewing and cutting. So I make sure I do line the bear. A bit of extra work but well worth the time saved fo the mishap.:)
Past Time BearsBig welcome to you, Teddygerda from South Africa!! Glad to have you here and hope you have a good time. Hopefully you will post more often so we can get to know you!! Thanks much for your contribution to the real fur topic! Hugs,
 Luxembears
Real fur bears are great. I learned bear making and designing on real fur before ever trying mohair. I have made real fur bears from many many types of fur.
My favorite has to be alpaca. It has a wonderful pile and trims beautifully for facial details. It also airbrushed like a dream.
Fox fur is also a wonderful fur to make a bear from. My advice for any fur bear is to use the very best parts for the face. Make SURE the cheek area is equal in fullness on each side. That really goes for the rest of the bear too. Like Eileen said, the fur varies in length and thickness through out. For example, take a fox fur pelt. The bellie area has little to no under coat so I tend to avoid those pieces.
Mink is also a nice fur but for a beginner can be a bit more difficult to get a really nice smooth effect on the cheeks.
Beaver fur , I find to be more difficult to use due to the thickness of the hide.
Agora goat pelts are also very thick but the fur is stunning. These are hard to find.
New Zealand Sheep is probably the biggest challenge as the fur is incredible thick. You need to make a really large bear and there is no way you can use a machine. But MAN, does it make a nice bear!
Tibetan lamb is nice but more difficult to trim into nice cheeks. This would be a case where you could insert alpaca for the cheek area. I love combining two types of furs. It has to be so it looks right in color and texture but it does make for a very interesting and more colorful bear.
New Zealand Opossum is a great fur if you can get your hands on it. It has a thick spongy pile and trims beautifully for facial details and this fur is the most bear-like in color.
Rabbit fur is very messy but makes very pretty bears. You need to be careful to really "map" the direction of the fur to get nice even cheeks.
Muskrat, sable, martin,nutria furs are softer than mink and make super bears.
Arctic fox is the most fantastic fur! also the messiest! Don't try this until you have some experience working with real fur. It is very expensive but when you touch it you can see why.
Curly lamb makes adorable bears but is a bit tougher to work with as the leather backing is thick, same with raccoon.
Lynx is easy to work with if you are lucky enough to get your hands on a coat made from this exotic and colorful fur.
Chinchilla I found to be a very difficult fur to work with...probably the most frustrating as my thread pulled the fur thorough with every stitch.
Experience is your best teacher too. oh, and I always try to do my cutting outside....you'll see why!
 Winneybears and Friends
Hi Shelli...What has not been answered for you ? Lots of good tips here.
I started making bears from real fur, I like mink the best. I first cut out all the parts from muslin and mark the nap on the pieces, it helps later when you are busy concentrating on many other things that this you won't get wrong.
Providing you fur lining is out...most fur garments, collars, stoles were made so both right and left sides match in fur color, length, and texture and nap...so I cut the garment in half...cut any darts apart so now the fur piece is flat.
I look over the skin side,..use a RED perm marker and circle ANY hole, thin skin, tears, ect. and turn the fur over to check the front side for rubbed off fur , worn areas ...you will need to carefully eyeball them then turn the fur back over and mark that area on the skin in RED. NOw...what you have left is basically OK fur to use.
I then use a BLACK marker and mark on the skin side the naps as they often change within a garment.
Next... I lay BOTH right and left pelts on the table....I look over the fur side and decide where is the best area to lay my HEAD pieces...they should be layed in the same spot on each fur pelt so they match in color, length and texture...
you will need to next select where the lay the center head piece which must match as close as you can with the side head pieces...
I proceed to lay out all the MUSLIN parts onto the pelt backs until all are matched then I use a office stick roll up glue and tack the muslin down..
I use a 4" pair of very sharp scissors to cut out the parts...turn them over and check all the parts to see if everything matchs up as you want.
Sometimes there is not enough fur of the same length so I usually decide to use the shorter fur on the body pieces and you can get away with using imperfect or wacky fur for the under the arm piece.
If you get a garment that has sewn pelts alternating with leather strips sometimes you can get the leg and foot to fit between those strips but if not ,,,well then its a problem .he, he... If you buy Nancy Tilmans book she will show you what you can do...more decisions...
I overcast all the parts by hand with any thread , use a larger stitch using Guttermans thread . Use a tested pattern so you are sure where the joint holes go and I reinforce by lining the joint holes with felt, fray check...let that stuff dry !
What else....??? Post again if you have any more questions here....Winney
Baird'sBearsThanks, everyone, Great Ideas  and a Big Welcome, Teddygerda :D
I've got Nancy's book coming soon in the mail, and I know I'll be a lot wiser when I've read it.
Winney, your idea of cutting the stoles etc in half is brilliant. After the furrier's gone to all that trouble matching tiny little pelts, why not take advantage of work already done? I never thought of it! Thanks!
Eileen
Posts: 1,153Thank you so much Sue Ann for the " welcome back" (and Shelli too, on another thread)...I really was here everyday reading and just can't seem to stay away....Oh, and thanks to the gals who emailed me personally. Love 'ya all! :D
On this topic of fur, I would like to see more information on the lining aspect....what others use and how they attach it to the fur.
I know there are some brilliant ideas on this subject if you would care to share.
Nanc....
You girls are a wonderful resource. Thanks for all the great tips! It never occurred to me to simply use a pen to circle weak or pulled spots, so I could easily work around them; great suggestion, Winney!
I think all my questions are answered. But I know where to ask if I run into any more!
Posts: 23Can I use cotton lining that you use for quilts to line my fur bears?
Thanks~~ reading and learning
Jana
 Chaska, Minnesota
Well I love sewing with mink. It makes gorgeous bears. Everybody has great tips. The only thing I would add it this...Do NOT use iron on interfacing...very bad for the hide. Line your bear pieces with cotton or a good quality muslin and HAND baste it on to the bear pieces. This protects the hide when stuffing.
Also, the face is your most important feature, so pick a beautiful part of the fur that is a good color and condition. Remember to cut out the face and gusset pieces in the same area of each other so you don't have wild color differences in the face.
Now for the hairy part!!! I cut out my pieces and am careful NOT to shake them out. I sneeze and cough and it gets ugly. So I cut out the pieces. I take my handy dandy hand - held Dirt Devil vacuum (hose attachment connected), I hold on to each bear piece (firmly), turn on the Dirt Devil and let the vacuum hose suck in all that excess fur that would have flown in my face with a manual shake. Now I have lost a few pieces to the vacuum. I just turn it off and dig it out of the bag....start all over again.
Use leather needles for all hand and or machine sewing even for basting on the lining pieces. It makes it easier with the right needles.
Michelle
Baird'sBears Great advice, Michelle
I cut out the fur pieces first, then use a bit of LeatherWeld to fix them to a piece of muslin. Once the glue is dry, I can cut out the muslin following the fur pieces--saves me a lot of time!
Glover's needles for handsewing leather and leather sewing machine needles are a must. Their tips are chisel-shaped, so that they penetrate without tearing.
Especially when using mink, it pays to spend a lot of time placing your pattern pieces on the pelts. This applies not only to color matching and direction of fur. If you intend to trim the muzzle area, for example, you want to place the muzzle pattern on a pelt with as few seams as possible. This results in a much smoother trimmed area.
 Matilda Huggington-beare
I'm glad this topic came back up. I had forgotten how indepth the postings were/are.
I have some rabbit left over from my early days. I put it away until my skill was more improved. hahaha
After having experienced all NOT TO DO in the above postings :redface:
My sister gave me this wonderful oil skin apron. I use it ALL the time I'm sewing and Needle felting.
If cutting fur outside it just slides right off my lap. Then the birdies come and line their nests with the wispy loose hair. 
 Brandon Bears
 Like you, I'm new at 'real fur' bears. I've made 4 of them. I also purchased Nancy T's book. I recomend reading it cover to cover before beginning. Tips that helped me: glue stick. Purchase a good brand. Glue on the liner fabric ONLY. When purchasing real fur, always ask about odor. Its REALLY hard to get that "old" smell out. Use a strong hand quilting thread. If possible cut the fur outside, if fur bothers you wear a mask. I used little electrical aligator clips to hold my pieces together and sewed by hand. Once a hole is made in the leather its there for good, so you dont want to get too many holes in the leather as it weakens it. I've used fox, beaver, black and silver mink. My favorite is the shered beaver. The black mink was hard to work with as it was black, Yet the bear is my favorite....The sheared beaver bear is so whisper soft that my 30 yr. old son bearnapped him !
Have fun, post photos.
Donna a.
Posts: 81st post to the site!!! I took a short break from bear making and want to get back into it again. I've worked with mohair, wool felt, needle felting and have made several for a few years. I have a friend who'd like me to make a bear for them out of her real fur fox stole. I've been reading alot of entries......wow alot of good advice. A bit overwhelming ha! ha! Can I sum up a few areas and see if I'm "on track" so to speak. I've never worked with fox and I just got it in the mail the other day. From what I understand it's best to -
A) be sure to line it. From the very last post here by Donna she notes being about to use a glue stick - would I glue say a soft cotton fabric and use the glue to the very edge of the fur backside? Is it easy to handsew thru or should I leave a small edging unglued?
B) be careful stitching - sounds like it leaves permanent holes more than mohair.
C) cut carefully - extra shedding
D) use a quilting needle - I do plan to sew it entirely by hand.........hope this is a possibilty with real fur.
E) I've read a leather nose probably looks best but I've never tried one and don't have instructions for it.......maybe there's online instructions someone might be able to notify me of? Otherwise I think I'll embroider it with a felt template.
* One thing I didn't read about.........is there anything one should do to the finished bear simply because it is REAL fur that you might not due to say a bear made of mohair? Somekind of preservative idea???
Thank you all......sorry for all the jabber........just wanted to talk to people who've worked with real fur so I don't make any mistakes.
Lisa
Baird'sBears Hi Lisa--Welcome to TT! 
I'd recommend leather needles or glover's needles. You can buy them just about anywhere, including WalMart.
They come in hand and machine versions, and their tips are chisel-shaped rather than pointed, which means that they penetrate leather much more easily than even sharps do.
Posts: 8Eileen........thank you for the welcome and the helpful hint about the needles. I'll be sure to pick up the "better needle for the job" !!! I like the previous idea about the glue stick.......if anyone can help me decide which type of glue stick is best for the job and just how far on the lining piece to glue it.......I would appreciate it. I just don't know if I should be sealing it completely to the edge which I would be stitching thru or should I leave a gap for stitching ease??? Thank you so much.........Happy Holidays!!! Lisa