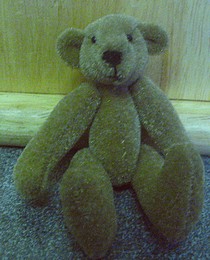
For artists and collectors sponsored by Intercal...your mohair supplier and Johnna's Mohair Store

It was when I saw the mini pattern I designed from way back that I decided to have another go. Again another hmm as it seemed too much hard work but they are quite addictive are'nt they. Quite a few minis later and thats what I do!
I still hate sewing feet pads in though! 
AWWW!!! I am glad to see that you posted your first mini... still very cute but I can see that you have come a long way  I hate sewing foot pads on the minis as well.. gosh, I think that was one of the most frustrating things!
Ha! I thought I was the only one who hated sewing in footpads!!!! Yay! Now I don't feel so alone! I will be happily sewing along and then it happens, I 'ugh' because I've come to the footpads....
Kimberly W.
Ha! I thought I was the only one who hated sewing in footpads!!!! Yay! Now I don't feel so alone! I will be happily sewing along and then it happens, I 'ugh' because I've come to the footpads....
Kimberly W.
HA HA... paw pads are ok on regular bears but on minis they are HORRIBLE to do!!! LMAO... I hate stitching up stuffing holes more than anything!!! 
Amanda - I'll have to find my first one and show you - you will laugh. Especially the first one I designed...I was so proud of it and now it lives in a box!!
for the footpads - this is one thing that i find helps make it easier
take 2 needles and thread with your preferred thread. I like ultra thin ultra sharp needles for paws.
Now insert one needle at the centre toe of the paw pad from wrong side to right side and then through centre front of foot from right side to wrong side (i.e. seam)
Put other needle through centre back of toe and then centre back of foot in exactly the same fashion.
Now it should be sitting into your foot opening like a regular footpad does.
Take JUST 2 or 3 stitches with the needle at the toe - as I'm a lefty, I head clockwise round the pad, I think you right handers go anti clockwise.
Now, take 2 or 3 stitches with at the back of the foot, heading down the opposite side of the pad than the first stitches. (I continue clockwise ) Now that you have anchored that foot pad in there you can either keep going with small sets of stitches from each needle, or do as I do and go back to the toe and entirely stitch that half and then back to the heel and finish of that bit.
This method is so good for helping keeping the paw pad nice and centred and psychologically it suits me because I only have to stitch half at a time and so it seems quicker which of course it's not but it helps me to think that it is! 

Aww Amanda, what a sweetheart he is, truly. Keep at it the feet pads get easier....hoenst...I have a trick I use for golly feet pads that makes them a breeze if you think it wil help I'l l share it...
hugs
dilu
Yes share away Dilu anything to make life easier. I will try Melissa's way too but you can't have too many 'easier' ways. Vile job pawpads! 