Banner Sponsors


For artists and collectors sponsored by Intercal...your mohair supplier and Johnna's Mohair Store
 Creative Design Studio (RKR4CDS)
My Photoshopper son has had oral surgery and is down-for-the-count.
He ran through this last week with Ole Mom but somehow I knew this part wasn't going to stick; he zipped through it too quickly for me to write down all of the steps. And I do mean that I need to write down every single keystroke until it becomes routine.
I'm creating a banner from different Layers and it's the creation of NEW Layers that has me stymied - unfortunately I lost one of the master copies I had last week and needed to make another.
I have used the Magnetic Lasso Tool to draw around the object I want to capture... now what?
I don't remember what Neal did to turn this into a transparent layer.
Nothing is movable/drag-able/transferable.
Nothing is showing up in the Layers 'History' though every time I click on New Layer, a new one appears under the History Tab above and under the Layer Tab - but they're empty.
Does anyone have a relatively simple explanation for what I'm doing wrong or missing?
I'm sort of under a time clock. I made one last week, with him here, but it ended up 500 pixels wide and I need it 800, so I have to start over and size everything all over again; good practice—now if only I knew the pathway
(No, I don't even want to know about Paths!!! LOL)
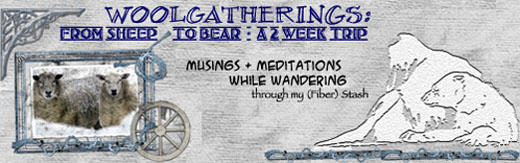
It's the Sheep postcard I have cut out ready to move onto the background....
 Kran-Beary's
Here's how I would do it:
Assuming that you already have a background created for your new creation:
Select the item you want for your new layer as you've done with the magnetic lasso tool.
EDIT>COPY
Next,
Create a layer by going to LAYERS> NEW>LAYER.
Rename this new layer whatever you want so that you can keep track of multiple layers. Click OK.
Select the new layer in the Layers panel on the right.
EDIT> Paste your selection into the new layer.
You should now be able to drag, move around the selection. You can adjust opacity in the Layers panel at the right.
Hope this helps you out!
hugs,
nancy t
 Pennsylvania
I think you are trying to make a LAYER MASK.
First, you understand layers. Right? Basically, think of them as sheets of transparent plastic, all stacked up. Where a layer has an image, you can see it through the top of the stack. Where there is nothing, the image on the layers beneath show through.
I think you get it this far. Right?
Okay, what if I have a picture on a layer and it takes up the whole layer?
Nothing on the layers below will show through. Still with me?
You could erase part of the picture on a layer so that what's underneath will show but there's another way.
There is a part of the layer that is partially hidden from view unless you go looking for it. It's called a LAYER MASK.
A layer mask is basically a transparency map. It goes hand-in-hand with each layer.
The layer mask is either black or white or a shade of gray. There is no color. Only grayscale.
The parts of the layer mask that are BLACK will make parts of the picture become transparent.
Parts of the mask that are WHITE will be normal.
Parts of the mask that are GRAY will be partially transparent. (The darker the color, the more transparent.)
You can literally use a paint brush tool and paint black on parts of the layer mask and the corresponding part of the image will be transparent.
You can use your selection tools (lasso, quick-select, etc.) and select parts of the image then use that selection outline to fill in black/white to select the parts of the image that will be transparent/opaque.
Using the layer mask is better than erasing parts of your image because once you erase, you have lost that part of the picture. If you use the mask, you can undo, redo and readjust your work until you get it just right. You can also feather the edges of your mask (make them blurry) so that the cut-out parts of your image blend into the rest. This avoids that "cut-out" effect you see in a lot of "bad" Photoshop jobs.
Here, download this file: https://files.me.com/randystankey/fhw1su
You'll get a Photoshop file of Pudge, the Bear. The picture background has been removed so that you can see how layer masking works.
If you have any problems let me know and I'll help. Just send e-mail.

Creative Design Studio (RKR4CDS)Ahh Nancy - the 'Missing' step! It all comes clear now-- I was supposed to click New Layer from the Toolbar word - Layer along the top, not anywhere else that I see 'Layer'.
I DO remember that now, I just totally blanked on it all day.
I'm heading for bed now with my aching head and will start fresh tomorrow - THANK YOU, MUCHLY!!!!!
That was great, I can see why you're in charge of teaching: Clear, Simple and Succinct!
hggzzz - B
Creative Design Studio (RKR4CDS)And Thank you Randy- I had a college girl friend here last week too, both Sarah and Neal were using a bit of that (your instructions are very familiar to me know that I see them in print form, I recognize what they were doing on the monitor from following your wording, I've printed out both of these for reference as I need the back up of seeing it in step-by-step print) and that's how they both got that nice 'crisped' faded edge; it appears crisp because you don't see the little bit of faded edge around your ted's fur.
I did look at that Layer Mask as an option after I has laboriously drawn around the sheep motif several times (the tool kept jumping ahead and connecting when I was nearly done and I had to start over again  )
)
I'll try your way too as I want to cut out the fence/ribbon border to use as another element. I hope to combine all of them at one point or another.
Once you get familiar with a set of steps to tweak pix, I can go through my 10 or 12 per image in less than a minute and find that after 6 or 8 years I never vary my investigations - and PS does so many other things.... Never seem to take the time to crack a book open or even experiment w/the other tools that just sit there!
It's on my list as an addition to my 'Year of Writing - 2011' though, this is a good start!
I'm glad you two were up late. Thanks again for solving part of my headache!
PennsylvaniaI didn't take the time to make Pudge's layer mask perfect but it is good enough to show the technique. If I wanted to do it pefectly, I could have taken more time.
I might suggest that, instead of the Magnetic Lasso tool that you use the QUICK SELECTION tool.
The Magnetic Lasso is good but Quick Select learns from your actions.
Choose the Quick Select tool, set your brush size and your mode (Add, Subtract or New Selection.)
Now, when you drag over the picture, whole areas will be selected based on color and contrast between pixels. You will be able to select a large area very quickly. You will probably end up selecting too much area in places where there is a hard-to define border but don't worry. This is where the tool learns from you.
Hold down the <alt> or <option> key and drag over the area that was selected that shouldn't have been. You will UN-select part of the area and the computer will remember what you unselected. The next time you go to select something, the computer will use its memory to help you home in on what you want to select.
If the computer tries to remember "too much" of what you did and it becomes hard to select things, type "QQ" on the keyboard. The computer will forget.
This is how I selected around Pudge's ears without cutting off too much.
If you hold down the <alt> / <option> key while clicking on the black layer mask proxy in your layers panel you will switch to displaying the black/white mask and you can edit it directly using black and white pencil, brush, etc.
You can also go to the "Select > Modify > Feather..." menu choice to feather/fade the edges of the mask. This is what I did to make the fur fade into the background.
Another trick is to use the "Select > Refine Edge..." panel to fade and blend your layer mask.
F.Y.I. - This kind of work was part of my job until I got laid off. I'd be glad to help you as much as I can.
Kran-Beary'sHi again,
If you're comfy with layers and like to use keyboard shortcuts, you can also select the item you want for your new layer and then press CTRL and J at the same time. (Command and J on a MAC.) This will promote the selection to a new layer. To work on that layer, you must have it highlighted in the layers pane on the right.
hugs,
nancy t

