For artists and collectors sponsored by Intercal...your mohair supplier and Johnna's Mohair Store
Hello everyone,
I am just new here and am a beginner bear-maker. I have made a few basic critters that I have enjoyed so much, and am just starting to experiment with different techniques. I'm a bit stuck on something that is probably really easy for people who know about bear-making, so I hoped that maybe someone here could help me out.
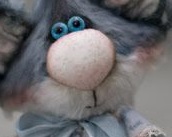
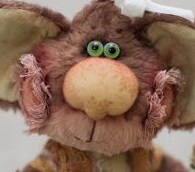
I really like the look of big fabric noses. I have attached a couple of pictures here to let you see the kind that I mean. However, I am having trouble achieving this look and I just can't figure out how to do it properly. I have been making the nose from two ovals of fabric, sewn, turned, stuffed and then sewn onto the face, but I just can't get it as flush and flat to the face as I would like. I think my noses are just too round. Is there a secret to doing this that I am missing? I have been sewing them on really firmly, but when the face is stuffed, the curvature of the nose against the face makes the nose 'pop up', if you see what I mean. I am wondering if these noses are sort of appliqued on - maybe only one layer of fabric, stuffed and then the edges sewn onto the face? They look so smooth and flat when I see them done properly and I am driving myself nuts trying to understand how to do it. I have googled everywhere but fabric noses don't seem to popular and I can't find anything.If anyone here could give me some advice then I would be really grateful.
Thank you so much!!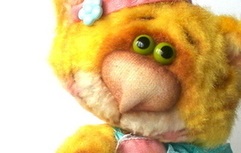
Hello!
I don't do fabric noses, but I think you could solve your problem if you attached the nose when the head is already stuffed. And you could also glue it, so that it really adheres to the fabric underneath.
This is how I attach my polymer clay (little) noses to the head.
http://kaleideascope.blogspot.ch/2012/1 … eedle.html
Maybe you could adapt the technique to your big fabric noses?
Thank you Francesca. I haven't thought about using glue before so maybe it would be worth a try. Thanks again!
Hello, Jane and welcome to Teddy Talk. To me, these noses look needle-felted . . . have you ever heard of needle felting? A lot of our member artists use this method of getting special effects. We have a section on the subject, so just go to the home page and look for it.
Hi, yes I have heard of needle felting before and have done it quite a bit in the past.
I am almost sure that they are fabric though as some of them have patterns on them...like this one...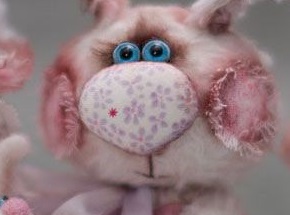
I'll maybe resort to needle felting if I can't figure out how to do it with fabric, as at least I know how to do that!
Thanks for your help xxx
Hello Pink,
Thank you so much for your advice, I really appreciate it.
I am trying to make the underside of the nose flat, and the outside of the nose curved. I have been using cotton fabric up until now, stuffed with polyfill. I don't want to make the nose completely flat as I like it being big and bulbous!
The more I look at the pics, the more I think that it's a single layer of fabric, sewn on around the edges, as opposed to the completely round ball shape that I have been struggling with.
I'll have a play around with some stretchier fabric in a single layer and see what happens.
I have been a cloth doll artist for many years, and bear making is presenting lots of new challenges for me.
Thank you for your helpful advice xx
Just a thought - If you attach the fabric to the head all the way around, as you describe, could you then cut a slit in the fabric from behind (inside the head) and use that for stuffing the nose? (It's a technique that's used for trapunto.)
Becky
P.S. I found the photo below online. You can see the stitches that were used (I'm sure that yours will be more invisible), and I'm thinking it would be best to do this sewing before you try to stuff the nose. This might work best with flatter muzzles and heads with nice big neck openings, I'm guessing.)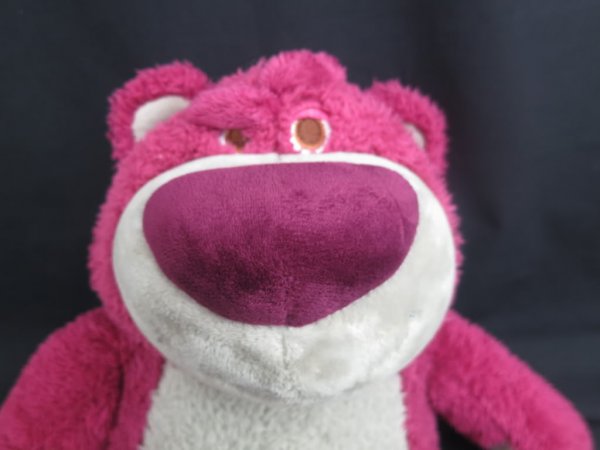
Hi Becky,
Thank you! I had thought about trapunto before as I have done some embroidery with that technique and it seems like a good option. I hadn't been sure if it would work on a bear's nose, but I wiil certainly give it a try now that you think it might work too!
Thanks again xxx
If I was doing that I would make the nose almost like a little pin cushion, whatever shape you are after....after stitching , leave a gap for stuffing then stuff it a bit then neatly ladder stitch it to the nose area with a bit of fabric glue behind. Once it's attached I would further stuff it and then close up with a ladder stitch. I am certain that is how they did those noses. Neat stitching would be absolutely key though.
Ooh, now that's a good idea Jenny -so sort of half-stuff it so that it can be sewn on securely, and then fully stuff it once it has been stitched in place. I would have never thought of that - thank you! I will go and give all of these ideas a try and I will let you know how I get on. xxx
Another idea although I admit time consuming would be to mould the nose in the shape you would like directly on the bear in flymo or other bake in the oven clay. Remove carefully to not spoil the shape, bake, then when cool smoothly cover with fabric and glue and sew in place with ladder stitch that way you get the exact shape you would like but it would be a solid nose. You would need trim the pile off the muzzle and only leave a small selvedge to tuck under the fabric nose to reduce bulk and as jenny said would need super neat stitching.
Good luck -let us know how you get on
michelle
Hi Michelle,
I think it would be worthwhile doing that as I'm starting to think that there is something solid underneath some of these noses. I have been all day pottering around with them and I just can't get that clean, crisp, seamless finish that I see in the pictures - I think that there is definitely more going on than meets the eye!! I'm sure that I have some clay somewhere in my stash, so I'll give that a shot - that's a great idea, thank you!!
I think it's stretch fabric...like the sort that dolls are sometimes made from that way it's easy to mould it to the shape you want.
Michelle's idea of the polymer clay base is a good one (I love to make polymer clay noses anyway). Perhaps covering the polymer clay with felt and then the fabric would give a softer feeling nose if that's what you're looking for?
Caroline