For artists and collectors sponsored by Intercal...your mohair supplier and Johnna's Mohair Store
Does the post office give the envelopes away free?....if not, what do they cost?
Oh yes..what about fabric dryer sheets...anyone ever use those ? You know I think they are the same material as "Pellon" type interfacing for sewing clothes... I have used it for doll clothes when needed and I suppose you could use it to make clothes patterns for you bears... Anyway...I could see them being used for wing material is it was stiffened and colored........Winney
I think they are free, Winney...
Yeahhhhhhhhhhhhhhhhh !!!!...Winney

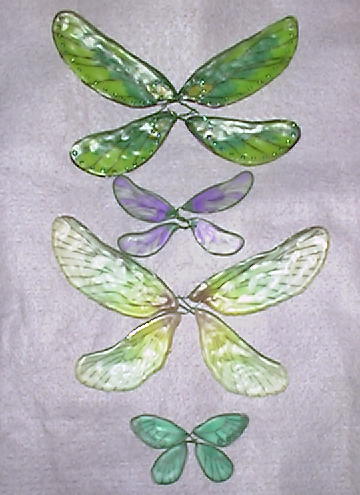
Your post got me itching to do a little faerie bear... Here's a pic of the wings I made. Is this what you were looking for?
Kimberly W.
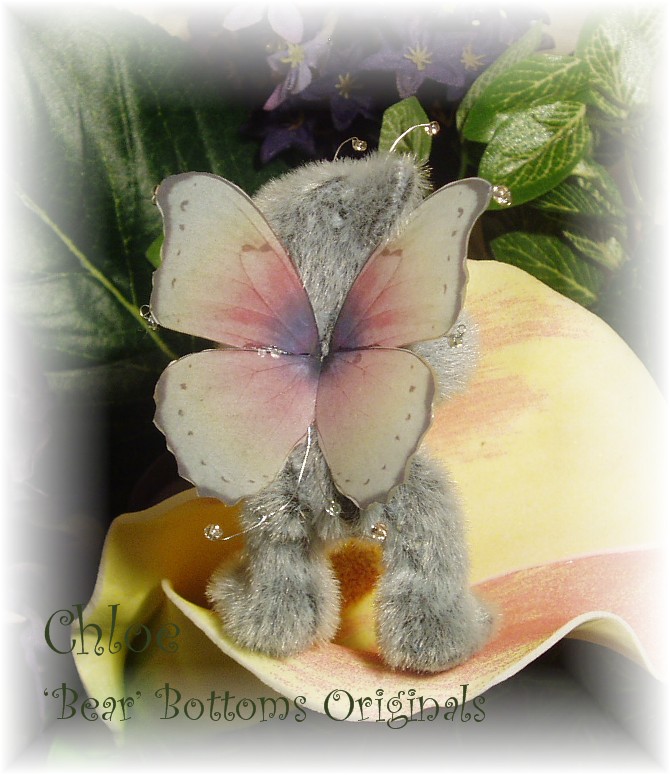
OOOH LOVELY WINGS, i wanna see the front of this adorable bear!! 
Hey Kimbee,
By the way, LOVELY photos in that post you put in of yourself... You are soooo pretty!!!!! I was replying to it when my two year old daughter turned off the power strip to the computer!!
Chloe is in the 'Bears For Sale'; I just posted her in there....
Kimberly W.
I just saw her after I posted that LMAO... thank you for the compliment  :hug:
:hug:
Yes Kim those are sort of what I'm looking for...so what's your secret?
Very Cute...I posted on Chloe's page!!!
No secret (except maybe the photo paper). I printed out those wings on the site that was mentioned before
http://www.elvenwork.com/wings.html
after resizing them down to about 2 inches tall. The kind of paper that I used might be the only secret, because I thought it caused the wings to transfer beautifully and all I had to do was peel them right off! I used Burlington brand, Satin Gloss coated inkjet photo paper (I think I bought it at Wal-Mart; it's a cheaper paper).
After I printed them out in a high resolution, I used really thin gauge wire (32 ga.) to make an armature that laid right along the top and bottom edges of the wings (this was the most time-comsuming part) with extra length (so I could put the beads on). I made a little loop on the wire where it would connect to my bear, so that I could attach it. After I laid the wire down, I got Translucent Liquid Sculpy and outlined around the wings, making sure I got the wire in there. I then used a paintbrush to smooth and thin out the Liquid Sculpey, covering the whole wing pattern. I baked it in the oven at JUST UNDER 300 degrees for 15 mins, then took them out. The wings just peeled right off the paper, with the image on them! I used a craft knife to smooth my edges and cut off any excess. Since they were in four separate parts, I super glued the tops and bottoms of the wings together.
I adorned them with little crystals and beads and viola!!
To attach, I left a tiny bit open in the back where I close up my bear, ran a needle and thread into the armpit, out that back little hole, through the wire loops, back in the hole, out through the other armpit, then back again to where I inserted the needle first. Then I just pulled tight and knotted it.
Hope that helps!
Kimberly W.
GORGEOUS wings Kim!
Beary truly yours,
Kim Basta
Wild Thyme Originals
http://www.picturetrail.com/bastadolls
Kimberly,
Awesome...thanks so much for sharing your "secret". I just read some stuff on that liquid sculpy stuff...thanks so much for that contribution, Heather...I have got to try it.
Love Chloe...she is a jewel!!!
No Problem, Shantell. Thanks for starting this discussion so we could all be a little inspired and learn something new! I'm so glad I got a chance to try these wings, because I love making them! Probably would have been about 5 steps behind getting started if it weren't for this post!
Thanks, Kim B. for the compliment! Remember my first little dog??? lol
KimBee, I checked out your website.... I'm loving your little furry kids!!! I have two BIG furry kids! and two not so furry kids, too.... lol
Kimberly W.
 Wow! There are so many great wings. The only wings that I have made are from fabric and I have been looking at the fairies and wondering how in the world do they do that. I didn't think to check the internet,
 thanks Julia & Shelli for all of the listings, I have them all in my favorites.
Heather, you already know that I am a huge fan of your sculpting but your wings are amazing!!! I hadn't heard of liquid sculpty before, so now I will have to get some of that. You said that you painted them before they were baked but what kind of paint do you use? And how did you get them to be rippled looking?
Terrie - if you are going to a craft store to find Liquid Sculpy, go to the isle where the sculpy clay and fimo clay are - thats where it is  I am waiting to get a 40% off coupon to get mine as it is $8 a bottle...
Thanks Kim, I will look there and the flyer should be out today so I will look for it. 
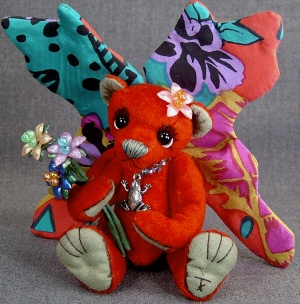
Terrie, your red bear has such a gorgeous little face!
I got some Liquid Scupley!!! Can hardly wait for the time to try making some fairy wings...this topic has been such an inspiration for me...Thanks to all who have posted here!!!
Terrie... that bright little fae is my all time favorite bear of yours... I've seen that one before! 
Beary truly yours,
Kim basta
Wild thyme Originals
Wow! There are so many great wings. The only wings that I have made are from fabric and I have been looking at the fairies and wondering how in the world do they do that. I didn't think to check the internet,

thanks Julia & Shelli for all of the listings, I have them all in my favorites.
Heather, you already know that I am a huge fan of your sculpting but your wings are amazing!!! I hadn't heard of liquid sculpty before, so now I will have to get some of that. You said that you painted them before they were baked but what kind of paint do you use? And how did you get them to be rippled looking?
You're soo sweet Terri.
with they liquid scuply add the paint before it's baked or anything. Kinda like mixing your own paint, only you mix it with the sculpy. You can mix anything in there, paint, glitter, little bits of paper, little beads etc.
As to how I got that tattered look, well I did that before it was baked. Hard to explain, but I didn't cut them after, just shaped it like that.
I'm soo happy some of you are going to try the liquid sculpy. It's soooo cool!
Please show pics!
Wow... You ladies are a never-ending source of inspiration and instruction. What talent! Thanks Shantell for starting this thread. :clap:
Kim, Those wings are beautiful. It's great news to learn you can do an image transfer to polymer clay with ink jet printers and photo paper! :dance: I've been wanting to do some image transfers for a long time. All the instructions I've seen previously say you can't use ink jet printers for this but must use color toner from a copier (which I don't have access to). I can't wait to try this! :dance: :dance: (See, it doesn't take much to make me happy  )
)
With all the talk of liquid sculpey, I thought I would share my favorite site to buy polymer clay (including liquid sculpey), http://www.polymerclayexpress.com/ They have lots of neat stuff including some interesting lessons. I think they have pretty good prices on most things, and I have always had a very good experience ordering from them. Sometimes they even send me a free surprise with my order.

I have been experimenting with Liquid scupley all day, making different wings. I discovered that good quality parchment paper works really well. I have no photo paper at this time, so I printed the patterns I wanted out on my ink jet printer & then traced the desired wings onto the parchment paper with a black colored pencil, then colored the wings in with the desired colored pencils. Put wire on & added the liquid sculpey and baked. I have the last set of wings in the oven right now! I will get pictures later on & post the results.
Thanks so much for all the inspiration & tips & links posted here!!!!
Parchment paper and colored pencils.... Great idea Charlotte! Can't wait to see how it turns out.
 Here are my first wings.
Aw, shoot ! can't see the picture. 
Ohhh noooo...it shows up here...akkkkk