Banner Sponsors


For artists and collectors sponsored by Intercal...your mohair supplier and Johnna's Mohair Store
 Deedle Bears
Hello to All,
I need a bit of help. I have a little mouse (about 3 inches) I am working on and I am struggling with the tail. Too small to turn and I have no idea how to tackle it! Does anyone have any suggestions? I see many other small mice but can not figure out how they have done the tail(s)?
Thank you!
 Kim-Bee Bears
I took a piece of wire and a piece of fabric and made it so it would wrap around, I coated the back of the fabric in tacky glue and wrapped it around and stitched with tiny stitches at the seam (with monofiliment thread).... I am not sure how everyone else does it but that is how I did it... Other suggestions gals?
Deedle BearsKim-Bee,
How thick was the wire you used?
I thought about something close (did not think of the glue) but using a chenille stem... I suppose I would close it just like the back of a bear, trying to hide the seam? Interesting idea, Thanks!
Duff
Kim-Bee BearsIt was a bit thicker than florist wire... I can't remember where it came from or what it was used for. A pipecleaner would work though too  I just had the wire laying around and though "why not". I could bend the tail then... lemme find a pic...
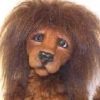
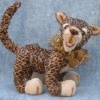
Kim-Bee Bears Here is Gouda - the mouse I was talking about (he was one of the first bears (actually a mouse) that I created....
Deedle BearsOoh, Pictures! I see why you all lov-em! Worth a thousand words :lol:
Great mouse! I get the idea, I guess I was worried beacuse the tail is ultra suede... I think this will work!
thanks so much!
Kim-Bee BearsHe isnt my best creation, but, as I said, he was one of my first creations
Sure! Glad to help
Deedle BearsFunny thing about bear (or mice) it is all in the eye of the beholder, I see many bears that are drop dead gorgeous then I see bears that have so much personality and find then just as wonderful! I was looking through posts yeaterday and saw the one about 1st bears, they were all to die for cute! Something about each face. I suppose that is what is so fun about bears! They all have a place in bear world!
 Wild Thyme Originals
Super cute mousie KimBee!
Duff... I'd try cutting out your tail, sewing it up just part way... still large enough to turn. then inserting the wire, and possibly ladder stitching up the whole rest of the tail. That's the stitch you are probably refereing to when you say, "like like the back of a bear." Good luck with him, and do let us see him when he's all done!
Beary truly yours,
Kim Basta
Wild tHyme Originals
 Posts: 1,153
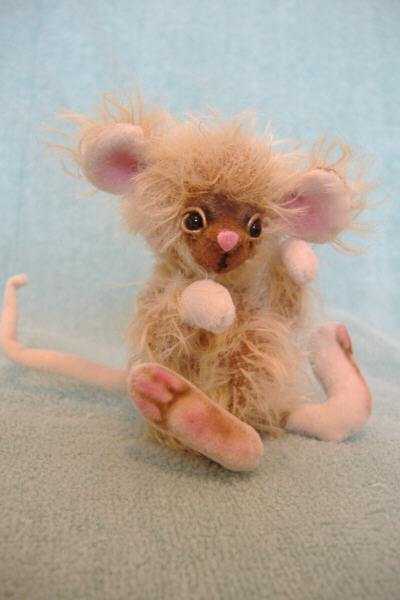
 Duff...if you would like to know how I create my tails, I would be happy to share with you.
Trying to find a tail picture.....
Wild Thyme OriginalsNanc... I am still in LOVE  with your mohair mouse! I'm so glad that he's part of your avatar!
Beary truly yours,
Kim Basta
Wild Thyme Originals
http://www.picturetrauil.com/bastadolls
 Donna's Duin Bruins
Duff,
I don't do minis but have done a few little mice to go with my cats. You can do a ladder stitch on the tail, stitching it on the outside. Another idea I have been toying with is to needlefelt a tail and then attach to my mouse.
Donna
 MerBear Originals
I've made mouse/rat tails out of grey ultrasuede with thin coated wire inside. Sewed them partway, turned and then ladderstitched it closed = like Kim said.
Marion
 Flying Fur Studios
Nanc, I would love to hear how you do your tails. I'm looking for a way to develop a dragon tail and your method just might work.
Man, I just love that mouse.
Posts: 1,153Thanks girls...I do have fun creating these little mice and your comments are so greatly appreciated.
OK...lets make a tail.
I use a fabric I bought from Emily Farmer. Emily calls it cashmere...but it really isn't. It has the white grid backing, so there is no raveling. You don't want a knit back back. Emily has opened a shop and as she told me, is going into her jewelry making that she loves so much. She will still do ebay but not as extensively as before.
Ok...if you have this kind of fabric.
You want to draw a tail as long as you want it to be. Place your paper so the line runs horizontally. On the left side of the horizontal line, at its end...draw a vertical line, that when closed would be the width you would want the tail to be that will attach to your mousies little bottom. On the left side of the horisontal line (at the bottom) draw another vertical line, but much smaller. This will be the tip of the tail when closed.
Now with a ruler, go from the outside top part of your left vertical line to the top of the right vertical line ...do the same from the bottom of the vertical lines.
I know I have made this more confusing than necessary. But in essence, what you will have is an elongated triangle...larger at one end and smaller at the other end.
With me so far? If not I will try to post a picture later...I am trying to get a bear photographed for ebay right now.
Take your cut out triangle and wrap it around the handle of a paint brush...or any stick that would graduate in size from pointed to larger. I then hold the fabric where I will be sewing secure with one hand and start to ladder stitch the edges shut...(around the brush handle). What the brush handle does is it gives the tail fabric support and contour as you ladder stitch. I use a size 12 needle...very fine.
When you have reached the 'butt' part of your tail... make a knot and I always leave a thread tail hanging there so I can use it later to attach the tail to the mouse.
Next...using a very fluffy chenille stem, cut it just about 1/8 " shorter than your tail. Push it in and then go back and attach the tail to your mouse.
You will have a very clean tail that can be posed in anyway you want it. I, of course, attach the tail, seam side down...but if you do a really good job with your ladder stitch, the seam will be very hard to detect.
I hope this helps girls...if not, post here that you don't understand my directions and I will check back later.
Happy 'tailing'...glad to help.
:hug:
nancy
 Winneybears and Friends
Ohhhh, I get it Nancy....good directions. I use to make felt and velveteen mice years ago..stil have my patterns...
I use to draw the tail like the shape you explained onto the fabric but...don't cut it out. Go ahead and stitch right on the line. then cut out 1/16th away for the stitch, fray check and turn.
One thing you have to remember to do at the start is...to allow for the turning so that triangle shape plus some.for turning would be in order here....after turning you can insert a wire or chinell stem...Just try some samples and you will find out how this works.
Later on I made ultrasuede tails and would stitch on the line but NOt turn anything...just slip the wire inside after cutting out....
I like your method and will give that a try next time.... Winney
Posts: 1,153great ideas too Winney...one thing I forgot to mention.........at the very tip, the small end of the tail , don't make it a point, but rather give it a little square edge. Pointy doesn't work!!! 
When you sew it it looks fine.
nanc.......
Deedle BearsWow! Great ideas everyone! Thank you, thank you, thank you! This is just what I needed, I am going to try the various ways and see the outcome... I'll keep you posted and take a picture when he is done. Just the ears and a tail to go, well, and a nose too!
Thanks! Duff
Nancy - wonderful little mousie you have there
Flying Fur StudiosNanc, you are the best!!
I had never thought of sewing it on a paintbrush or somthing. THat is a great tip!!!! Plus, I always forget to leave extra thread when I tie off, so I can attach it to the body.
You are just soo kind to post your ways. Your creations are very innovative, and some artists tend to keep that to themselves. And that's okay of course, but now I can make the best dragon tail ever!!!
Thanks Duff for asking the question, and again, thanks Nanc. It's nice to get advice from the pro's.
 Posts: 8,574
did anyone mention leather cording from the jewlery supply
didn't read everyone's post----time contraints.....
Nancy the little mohair critter was / is just too adorable !!!
 Creative Design Studio (RKR4CDS)
Isn't there anyone here as old as I am??!!
In the 50s & 60s we made dresses with spaghetti straps, which are just longer mouse tails!
As in making cording or piping, they are literally sewn over a string.
Cut out your tail fabric.
Lay right-side up.
Tie a 'wadded up' knot in a single length of heavy duty upholstery thread like Conso or Mastex, near one end.
Lay the thread down the center of the tail fabric, knot hanging out beyond the fabric..
Fold one narrow end over as if to sew - make sure the knot is still sticking out the end.
Hand or machine sew the 1 - 3 sts it takes to close the tip of a mini's tail.
Turn the corner and stitch the long seam down about an inch.
Keep a narrow seam allowance so you don't have a lot of fabric to pull into the tail's interior.
Dampen your thumb & fingertips for friction and hold the sewn inch between them.
With your other hand, Gently...gently... begin to draw the knot inside the 'tube'.
Continue sewing the long/side seam - don't catch the thread inside!! - while pulling through after every inch or so.
By the time you reach the base of the tail, the tip is right there ready to be pulled out!
Cut off the thread at the tip; the knot will stay inside the tip.
Insert a chenille stem or floral wire (end doubled & taped to keep smooth) for posability.
Your turning tool is literally the thickness of a thread!!!
This is an excellent way to turn other long narrow ears like bunnies'.
After sewing one side seam to the tip, insert knotted thread at the tip.
After sewing a little way down away from the tip, begin to invert.
IF the thread should pull out, it teaches you:
1 - to make a bigger knot next time!, and
2 - that you can re-knot the thread and re-insert it through the tip and into the tube with a doll needle.
It takes a certain amount of dexterity to work with a stick, a needle, fabric and the ladder st, which still gives some ppl a lot of trouble. This is much easier!
Bobbie
Winneybears and FriendsGreat Bobbie! Sounds like I need to try that...yes, I use to make those spagatti strap dresses in the 50's and 60's that's when I was real skinny ..lOL... We use to turn them with a " bodkin", long thin wire... Winney
Posts: 8,574Hiya Bobbie,
we may be the minority but were here, cellulite and all......speghettie straps....ahh those were the days.....forgive the spelling
dilu
Wild Thyme OriginalsWhat fabulous suggestions we have here on this topic!
I'm making some mental notes.....
Kim basta
Wild Thyme Originals
Posts: 1,153Ha...Bobbie, I have made many, many spaghetti straps in my day and Yes, I am a 50's 60's gal.
The fabric that I made my mouse tail from, however would not lend itself to our old spaghetti strap days. Wish it would have, definitely would bring back some great memories.
Do you remember MuMu's too, Bobbie? Boy we could whip those out in a couple of hours!!! :dance:
:hug:
Nancy

