For artists and collectors sponsored by Intercal...your mohair supplier and Johnna's Mohair Store
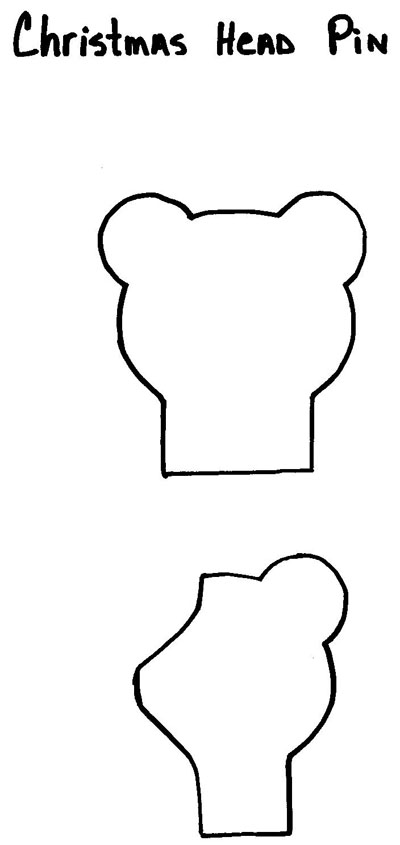 First of all here is your pattern. Just place your curser arrow on the white back ground , a small window will appear just click on the copy machine and you will have your pattern. Trace to a harder paper for a stronger pattern. The pattern should measure 3 inches from top of ear to bottom of neck. And 2 1/2 inches wide accross back of head.
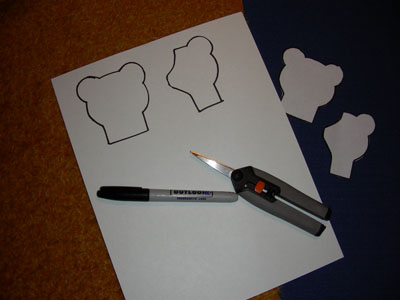 Here is tracing to harder paper.
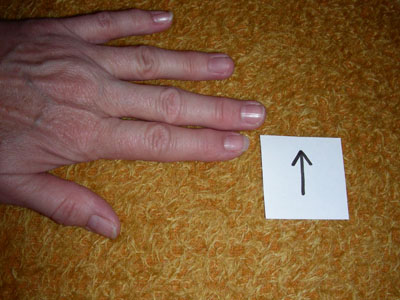 Find direction of your fur, mark it on back of fabric. Mine is curly not so important for me but you may be using a straight fur. I recommend something not to long. Fur should go in direction of down ward on the head.
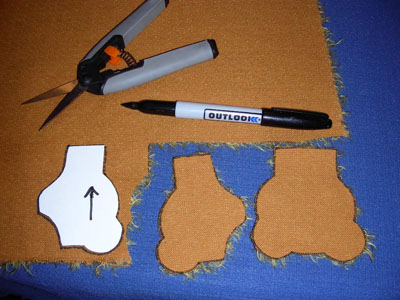
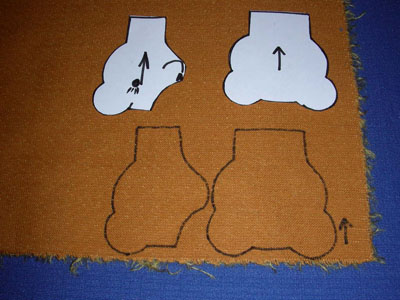 Trace your pattern to fabric. Paying attention to direction of fur flow. Start cutting out fabric. Be careful not to cut fur. Just do small snips to the back fabric.Notice you will need to flip front piece to get the two pieces for the front of head.
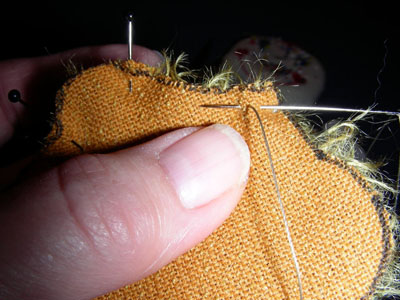
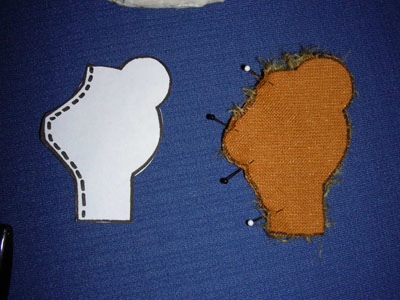 Pin with right sides together from top of head to bottom of neck . Now sew there also.Use a small seam allowance. By hand sewing will work best for this project.
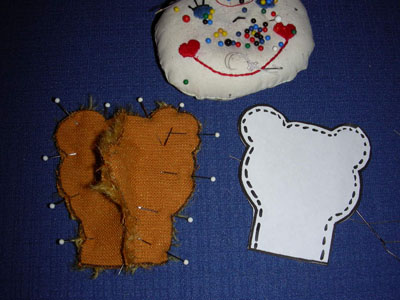 Now place this front piece to back of head , right sides together. Pin all around. Sew all around but leave bottom open.
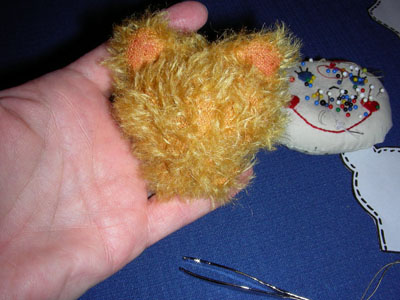
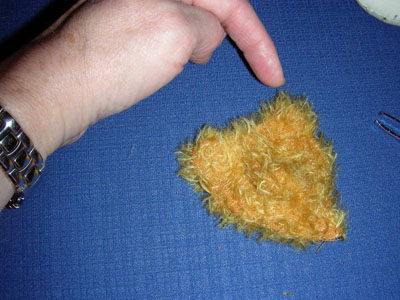 Turn and stuff one ear at a time. At bottom of ear area just stitch it closed with small stitches. Clip away some fur, use colored pencil to color areas of the cleared off ear area. Then stuff the head. Leave a neck at bottom, you will need that area to decorate.
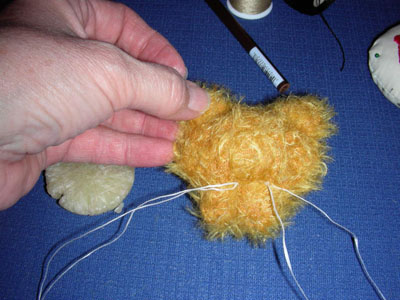
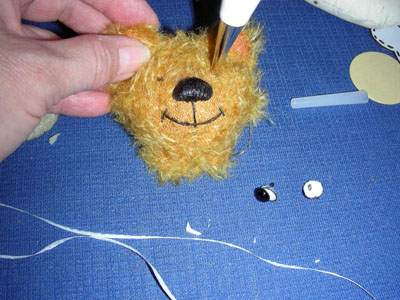
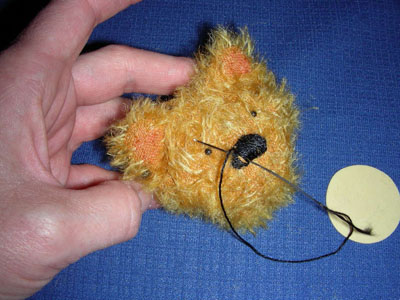 I like to place pins where the eyes are going to be and then do nose. You can re adjust eye placement as needed. I like to use waxed dental tape to put in the eyes with . Come out through the back of head about where I show you. Pull tight and double knot.
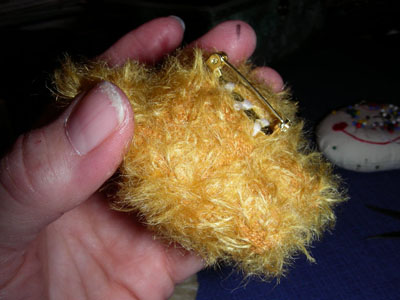 Place a craft pin on the back. You can get them at any craft store.
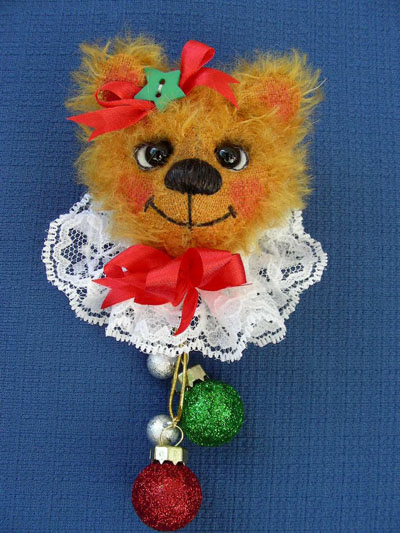 Now just design how ever you want. A girl , a boy, a reigndeer, Santa, elf, what ever you would like
FROM JODI FALK
I gotta say that's pretty darn cute! 
Really great pictures and easy instructions, Jodi! Because of it's ease (you even worked the ears into the 3 piece design...very cool) this would be a really cute project for older kids too. I always liked making my presents for family.
:hug:
~Chrissi
Oh, your beary Christmas pin is adorable. I can't wait to get the time to do some 


That is soooooooo cute. I think I will have to make some with my scrap material!
Thanks :hug: :hug: :hug:
Jane
Hi Jodi:
Your pin is so adorable...I am going to make one as soon as my show is over next weekend! I will finally be free :dance: :dance: to do anything!!!
Thanks Jodi for a wonderful and sweet idea!
Hugs, Nancy
Great idea and super instructions, Jodi . . . the result is adorable!
Hi Jodi,
Thank you for sharing your pattern and easy instructions for the adorable bear pin. I will attach it to the handle on the Christmas gift bags. What a cutie! All of my friends will love them. One friend loves angels so I will attach wings and a halo to hers.
Thanks again,
Marcia M.
That is super cute, and great directions by the way!
Hi Jodi,
Thank you for sharing your pattern and easy instructions for the adorable bear pin. I will attach it to the handle on the Christmas gift bags. What a cutie! All of my friends will love them. One friend loves angels so I will attach wings and a halo to hers.
Thanks again,
Marcia M.
Jodi,
I just wanted to say that I think it's so very kind and generous of you to share your ideas so openly. This is just one example of the many reason I love to check in to TT EVERYDAY...okay MANY times EVERYDAY.
Hugs,
Shantell
Jodi,
I just wanted to say that I think it's so very kind and generous of you to share your ideas so openly. This is just one example of the many reason I love to check in to TT EVERYDAY...okay MANY times EVERYDAY.
Hugs,
Shantell
Thank you sooo much Jodi...This is just what I was looking for, I'm supposed to make a bear to fit on a 4.5 inch square piece of fabric. 
For a project that my craft group is doing, this fits the bill nicely 


I can't get the box with the copy machine to appear??? 
Thats great !!! Have fun !!